Summit – 5,895m.a.s.l. (19,340ft)
Climbing Season – December-March and June-October
Time of year climbed – October
Duration – 7 Days
Difficulty –
Mount Kilimanjaro. The iconic “Roof of Africa”. It’s a mountain so well-known and popular that it’s an item on most people’s bucket lists, seemingly whether they’re into hiking and going up mountains or not. That’s the draw Kilimanjaro has. And it drew me in for sure.
During 2019, I began to budget and plan for taking on the once in a lifetime trek in 2020. However, the Covid-19 pandemic soon kicked those plans into the long grass, along with lots of other plans. Kili still loomed large in my mind though as the next big mountain I wanted to take on, and in October 2022 I finally was able to make the trip happen.
Who to book with?
The first big decision to make when considering a Kilimanjaro climb is who to book with. Do you go with a large reputable tour company? Do you scour Google for local companies and guides? Or do you just head out there and find someone in country?
I went with the first option and used a large reputable company in Much Better Adventures. I’d used Much Better Adventures for other trips in the past, including a hiking trip around Armenia, so I trusted them and knew what i would be getting for my money.
I would also recommend looking at G Adventures as well. I’ve previously used them for the Inca Trail and Everest Base Camp Treks and they’re a great company. Click below to visit their site.
Some things you really need to consider when booking, whichever approach you take;
- Is the price too good to be true? Unfortunately, there’s no real cheap way to do Kilimanjaro, it’s an expensive pursuit, so when a price looks too good to be true, it very likely is. Some companies pay their porters and guides appropriately, whilst others pay extremely poorly, and some don’t pay at all, having them rely solely on tips. This means companies may offer artificially lower prices up front, whilst the tour may end up costing you a lot more in the end as you get harassed for big tips. So always check what’s included.
- The exploitation of porters. As mentioned above some companies don’t pay the porters, or pay them extremely poorly. There is a recommended (though often ignored) minimum wage, and some responsible operators do ensure their porters have adequate shelter and food during a climb. But not all do. Porters don’t have many options or much power in the situation. There are far more porters available than are needed and they’re all desperate for work. Make sure the operator pays their porters and that the porters have adequate clothing, shelter and food during the climb.
- The operator’s safety record. Whilst summiting Kilimanjaro doesn’t involve any climbing, just trekking Kilimanjaro, it can still be a very dangerous mountain. The high altitude can lead to Acute Mountain Sickness, which can turn deadly if not managed properly. Make sure your life is in safe hands and check the operator’s safety record if possible.
- The operator’s success rate. It’s a lot of money to spend, to go out there and be unsuccessful would really suck. It’s worth enquiring about the success rate an operator has. You may not be able to verify their response, but generally a company that has a high success rate will be transparent and tell you, even give you numbers. A higher success rate indicates a better quality and better managed climb.
The Route
Once you’ve got that decision nailed the next big decision is the route you want to take.
There are several routes up the mountain; Machame, Marangu, Lemosho, Shira, Rongai, the Northern Circuit and Umbwe being the main ones.
I choose the Machame route. Also known as the Whiskey route. The Machame route has the highest success rate and with it being over 7 days, allows plenty of time to acclimatise. Adjusting to the altitude and avoiding A.M.S. is likely to be your biggest obstacle to summitting the mountain, so I highly recommend choosing a route that gives you a little more time.
The Machame route offers stunning views from start to finish and is one of the more scenic routes, taking you through a variety of ecosystems and climate zones along the way.
Preparation
Pre Departure
The good old 6 Ps. Prior Preparation Prevents P*** Poor Performance.
Before heading out to Tanzania you really need to do some training to maximise your chances of summiting. Whilst the mountain doesn’t demand an especially high level of fitness, imagine going all that way, spending all that money, and then being unsuccessful because you weren’t fit enough!
A good level of cardiovascular fitness to get to would be being able to run a 10k comfortably, but really you want to do more than just running. You’ll need to develop your strength as well as endurance, so weight training in the gym is always a good shout. You also need to make sure you’re developing the most relevant muscles and the best way to do this is get out hiking!
Train by doing consecutive days of hiking at the weekends. Getting out and doing 8-10k on Saturdays and Sundays in your local area is a great way to prepare, both physically and mentally. Take lots of water bottles to add a bit of weight to your backpack. The big benefit with using water bottles is that they can easily be poured out to lighten the load if it’s getting too much.
In Country
Just next door to Kilimanjaro stands Mount Meru. At 4,556m, Meru is a dormant stratovolcano located in Arusha National Park, 70 Kilometres (43 miles) west of Kilimanjaro. It’s typically a three day climb and offers a great chance to acclimatise before heading on to the big one. If you have the time in country I would recommend doing this, with a couple of rest days afterwards, before Kili.
Alternatively, if you’ve just got a couple of days in Moshi beforehand, as a bit of a warm-up more so than training, you can do a day hike to the spectacular Materuni waterfalls.

And then it begins…
Day 1: Machame Gate (1,800m/5,905ft) to Machame Camp (3,010m/9,875ft)
After a 45 minute drive from Moshi, the trek begins at Machame Gate. Before setting off you have to register at the administrative office and when passing through the gate your bags will be checked for plastic bottles and plastic bags. Any found will be confiscated, so make sure you have a proper water bottle and you’re not just reusing a regular plastic bottle.
You start your ascent through lush rainforest, and if your lucky you might spot a few blue monkeys. It’s a fairly moderate start to the trek, taking around 5-7 hours, and covering approximately 9 kilometers.
You’ll learn your first bit of Swahili early doors as the guides repeatedly call out “Pole Pole”, meaning slowly slowly. The guides will start drilling it into you early, to take it slow, preserve your energy and avoid getting out of breathe.
At the end of the first day’s trek you’ll arrive at Machame Camp, your first overnight stop, nestled in the forest zone. Here, you’ll settle into camp, have dinner, and rest for the night.
Eating lots of carbs is essential for fuelling your body when at high altitude, as your body burns them more readily and using carbs is more oxygen efficient for your body. The guides are very aware of this. You will be served mountains of food and relentlessly encouraged to eat, eat, eat.
Unfortnately altitude can effect your digestive system, and for me, after eating myself into a food coma, the food just sat in my stomach not going anywhere all night. A long nauseating sleepless night. So resist the pressure to overeat and know your limits, especially on the first night as your body adjusts from 950m in Moshi to 3,010m at Machame Camp, the bihhest elevation jump of the whole trek.

Day 2: Machame Camp (3,010m/9,875ft) to Shira Camp (3,840m/12,600ft)
After breakfast, you continue your ascent through the rainforest, gradually leaving the dense foliage behind. The terrain changes to moorland, characterized by heather and volcanic rock formations.
The day two trek is about 4-6 hours, covering around 7 kilometers.
Arrive at Shira Camp, located on a plateau with stunning views of the Shira Plateau and surrounding peaks.

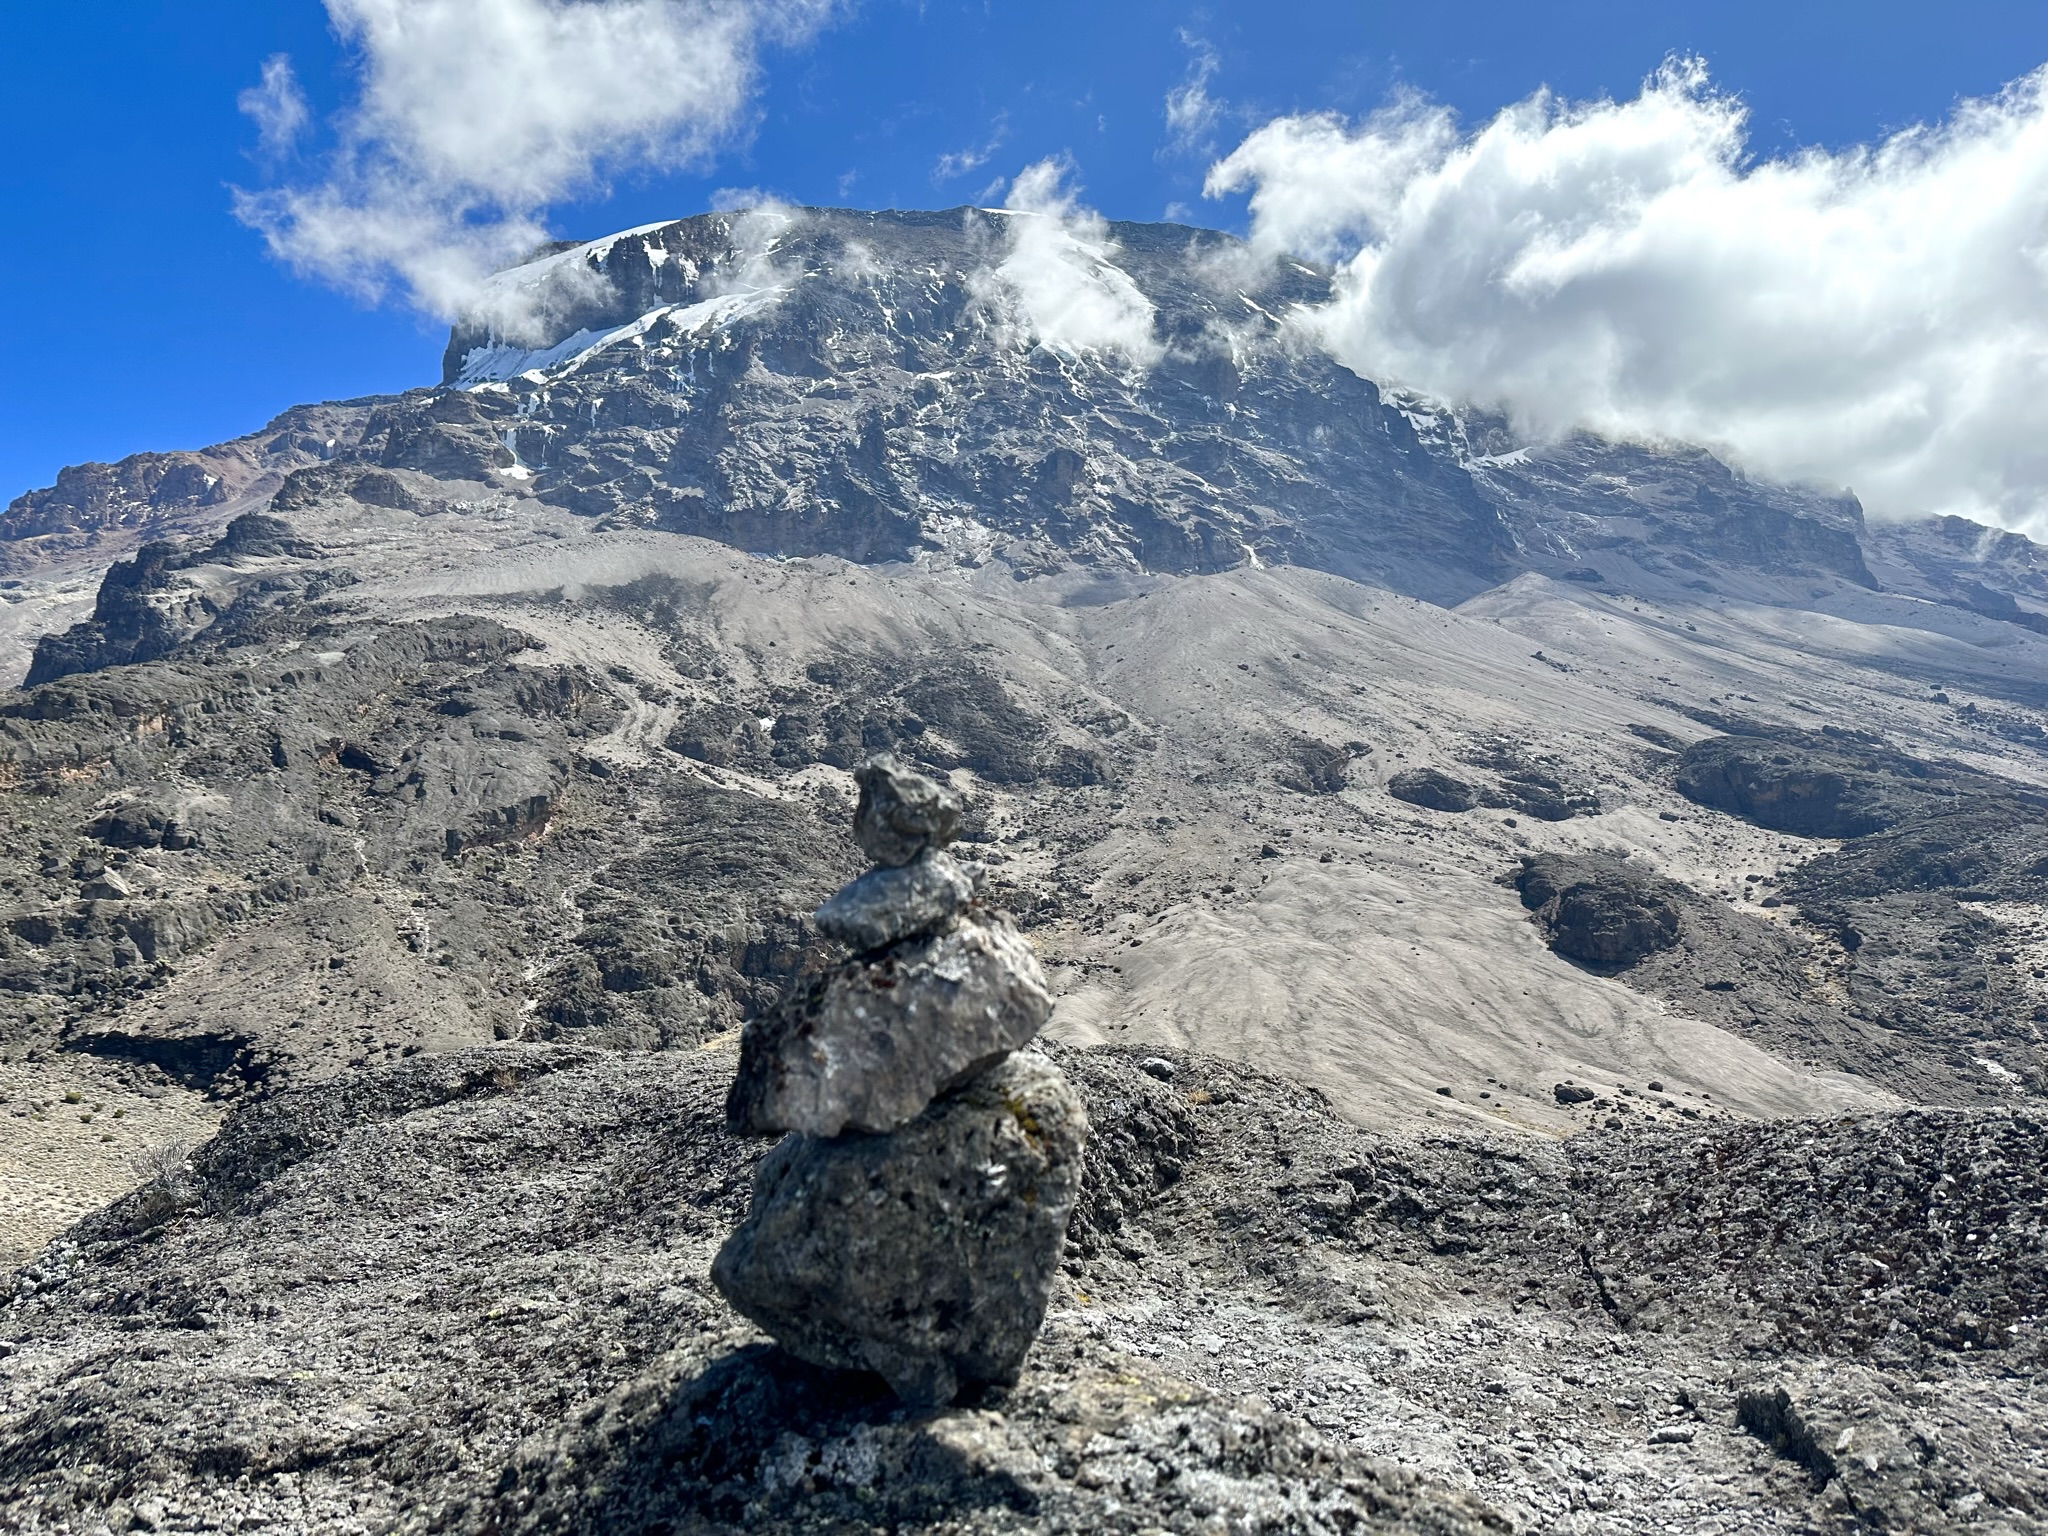
Day 3: Shira Camp (3,840m/12,600ft) to Barranco Camp (3,950m/12,960ft) via Lava Tower (4,600m/15,091ft)
Day three involves a steady ascent towards the stunning Lava Tower, also known as the Shark’s Tooth, because well it kinda looks like a shark’s tooth. This is a crucial acclimatization day where you hike high and sleep low to aid in adaptation to altitude.
When you reach the Lava Tower you’ll stop for lunch and take in breathtaking views of the surrounding glaciers and valleys, probably whilst getting a bit battered by wind.
After lunch, you’ll descend to Barranco Camp, passing through the alpine desert with its sparse vegetation. Here you’ll see the bizarre looking Giant Senecio Trees, which can only be found on Kilimanjaro.
It’s a challenging but rewarding day, taking about 7 hours to cover approximately 10 kilometers.


Day 4: Barranco Camp (3,950m/12,960ft) to Karanga Camp (3,995m/13,106ft)
The day starts with a steep ascent up the Barranco Wall, a great scramble with incredible views. The only slight downside with the Barranco wall is that it is a bit of a bottleneck and you may find yourself in a very slow moving queue
Once you hit the top of the 257m Barranco Wall you’ll be able to look out over the Heim Glacier, before cracking on as the trail levels out and you traverse the alpine desert landscape.
To finish the day you reach the Karanga Camp, situated beneath the southern ice fields of Kilimanjaro.
Day four’s trek is shorter, taking around 4-5 hours to cover about 5 kilometers.

Day 5: Karanga Camp (3,995m/13,106ft) to Barafu Camp (4,673m/15,331ft)
Day five is a short but steep day. The route continues upwards from Karanga Camp towards Barafu Camp, the final base camp before the summit push.
The terrain becomes more rugged and rocky as you ascend through the ever thinning air.
Arriving at Barafu Camp you’ll have stunning views of Mawenzi Peak. After a short rest you’ll set out on an acclimaticzation hike, heading a couple hundred metres up the summit trail before heading back to camp to call it a day.
This is a shorter hiking day, typically taking around 3-4 hours to cover approximately 4 kilometers.
After an early dinner, it’s off to bed to try and get what sleep you can before setting off on your summit attempt at around 12:30 in the morning.

Day 6: The Summit Day, Barafu Camp (4,673m/15,331ft) to Uhuru Peak (5,895m/19,341ft)
Day 6, the big day, the summit day. This is by far the most challenging day of the trek, both mentally and physically.
Setting off at 12:30am is a grim experience despite the excitement. I always struggle with sleep at altitude and hadn’t slept a wink before we set off. I was pretty badly sleep deprived. I felt, and looked, like an extra from Shaun Of The Dead, requiring a cattle prod to make each step. Everyone in the group was struggling in one way or another from the altitude; migraines, vommiting, diarrhea. To be honest, I think I got off lightly being only sleep deprived.
It was also -3C, with on and off strong winds that cut through all 6 layers of clothing.
Before setting off we were told that Stella Point would be a point of no return for going to the summit. Past that point you couldn’t descend back the way you came and the summit was only 30 minutes further. So in my mind, that was the goal, not the summit, but Stella Point, get there and it’s job done.
An important lesson…
The pace was slow and we had short breaks regularly, but eventually our group of 5 had to split, with 3 of us going ahead and 2 people going much slower as they struggled with the altitude. They looked properly worse for wear, and from one of those two individuals, I was later told a story where I learned one of the most important lessons I’ve ever learnt about climbing at altitude… Always, always, bring toilet paper.
The altitude afflicted individual, on the beautiful slopes of Kilimanjaro, on the summit trail to the roof of Africa, was badly struck with diarrhea.
During one aggresive bout, they had managed to find a small rock to go behind in their barren surroundings. The rock didn’t provide full cover, people coming up behind could potentially see but there was a decent enough gap to the next trekkers and seemingly plenty of time. The brown rain began to fall. And fall. Then, all of sudden, people were unexpectedly coming up from below.
They quickly tried to clean up with their wet wipes. They tried. Oh how they tried.
The wet wipes had frozen into a solid block.
They frantically tried to tear bits off, but only tiny bits were coming away. Hopping around like a frog with it’s legs tied together, they managed to get themselves a little bit more out of sight before eventually pulling away a decent enough sized lump of wet wipe to clean up and get their pants back up. Moments later the fellow trekkers trudged past, eyes wide, staring straight down into the ground. Who knows what they saw, the unexpected horrors they might have witnessed on their special, once in a lifetime climb. They never mention those kinds of views in the brochures.
Back to the climb
As a group of three we moved a little faster as our guides stressed the importance of getting up and down quickly. As if we needed a reminder about the seriousness of the altitude, whilst going up several people came back down past us, oxygen mask on and clinging to their guides arm.
As we neared Stella Point, the sun began to rise, and with it my brain fog began to clear and my sleep deprivation faded away. Coming up behind us was a guide with a boombox and suddenly I felt light on my feet and knew I’d be getting to the summit.

Jambo, Jambo, Kilimanjaro
Stella point came and went, and after a total of 6.5 hours, we finally arrived on the summit. And the views were incredible. It was all so worth it.


We only spent around 10 minutes at most on the summit before our guides hurried us to go back down. We took as many photos as we could, whilst others were doing the same. One girl, from another group, was wearing a big snood which came up over her nose. As she slowly pulled it down to smile for a photo her lips were bright blue. And on that note, we quickly agreed with the guides to head back down.
On our way back down, we ran into our other 2 groups members, still soldeiring on despite their ailments. They both went on to summit in an incredible effort, which was a real testament to their character and the ethos of mind over matter.
The Descent
The descent over day 6 and 7 is a long one, paticularly Day 6 coming down from the summit. You descend on a long, steep scree slope back to Barafu Camp. There’s no hiking here, you practically ski down, and it’s as tough as the ascent, if not tougher, in my opinion. But, as you quickly lose altitude, you feel better and better… and better.
The sense of pride and achievement carries you all the way back down and lingers on for long afterwards.
Top Tips for Climbing Kilimanjaro
Here are my top tips for climbing and successfully summiting Kilimanjaro.
- If you’ve read this far, you can probably guess what the first one is. Always carry toilet paper. Not just wet wipes. Wet wipes will freeze solid on the summit day.
- Get fit. Being fit doesn’t guarantee your body will be able to adapt to the altitude, but it certainly doesn’t harm your chances, and will make the trek far more comfortable. Get in plenty of training, and do some multi-day hikiing, before you get on the plane to Tanzania.
- Layers. The summit day is likely to be below freezing and windy when you set off. You’ll need at least 6 layers on your upper body, and 3/4 on your lower, to keep yourself warm. It’s well worth investing in a good windproof shell jacket and a light down jacket as a mid-layer.
- Pole Pole. Go slow. Going slow allows your body to acclimatise better by not burning up the oxygen in your blood and wearing out your muscles.
- Use trekking poles. these can also help preserve your energy by taking some of the load off your legs. Most importantly they are a godsend when descending the scree slope after the summit.
- Drink plenty of water and keep hydrated. Aim to drink at least 3 litres a day, 4-5 litres if you’re using Diamox.
- Eat as much as you can each evening, but be wary of over eating, particularly early on in the trek, you’re stomach won’t thank you if it hasn’t yet adapted to the altitude.
- Not so much a tip for summiting, but a tip for afterwards, head to the stunning Zanzibar island to celebrate and recover
