Summit – 4,203m.a.s.l. (13,789ft)
Climbing Season – November – April
Time of year climbed – November
Duration – 2 Days
Difficulty –
Tajumulco Volcano, standing at 4,203 meters, is the highest peak in Central America. Located in the western highlands of Guatemala, near the city of Quetzaltenango (Xela), it offers breathtaking views and is just about as incredible a place as you can get to take in a sunrise. The high altitude and cold conditions provide some challenge to what is otherwise a relatively straightforward climb, and the reward of the summit far outweighs the exertion to get there.
Getting to Tajumulco
Step One – Quetzeltanango
The first step is to get to Guatemala’s second largest city Quetzeltanango (or Xela, by it’s Mayan name). Quetzeltanango can be reached by bus, or shuttle, from Guatemala City, Antigua and Lake Atitlan.
I would recommend using Guatego. I used them to organise travel around Guatemala and Belize and had no complaints, they’re reasonably priced and offer a range of different services, from basic coaches, to luxury buses and ferrys.
Step Two – The Trailhead
After getting to Quetzeltanango the next step is to head to the trailhead. If your planning to climb Tajumulco in a single day, you can hop on the colorful local “chicken buses” (which is an an experience in itself) to San Marcos or Tuichán to get to the trailhead. However, personally I would recommend climbing the mountain over two days so you can summit for sunrise, and for this I would recommend going with a guide/company.
If you climb over two days, you can camp at around 3900m, leaving yourself just a small summit push to do in the early hours of the morning. Having experienced guides and porters is invaluable to ensuring you have an enjoyable hiking and camping experience, in what can be challenging conditions with the unpredicatble mountain weather and high altitude.
I climbed Tajumulco as part of a tour booked with Much Better Adventures, which was facilitated by local guide company Old Town Outfitters, based in Antigua, Guatemala, who i would highly recommend.
The Climb
Setting Off
We set off from Xela early in the morning for the 3 hour drive to San Sebastien. Arriving there, we were faced with our first big decision.
The first 70% of the trail from San Sebastien is a road winding it’s way up the side of the volcano. The road is long and, for the most part, doesn’t offer much in the way of views. Whilst hiking up the road, cars passing by every so often, tend to gas hikers with their dense exhaust fumes, which cling to the nostrils long after the car has passed and somewhat take away from the feeling of being out in nature. Going with a big tour group we had a real mix of abilities and fitness levels as well, so the first big decision – do we drive up the road, rather than walk, to save time and legs, and give people the best chance to summit?
… easy decision, we drove.
We were loaded in back of pick up trucks, packed in like cattle going to market, for a knee crushing 30 minute ride.


On the Trail
We arrived at the point where the trail leaves the road and from there it was just a 1.5km hike, with 400m elevation gain, to get to our campsite. The hike took just under an hour as we wound our way up through a beautiful forest, made more beautiful by the haunting mist that had begun to roll in.
We had saved a lot of time by driving part of the way, so we had more time to relax and enjoy the campsite… or maybe time to go for an additional sunset summit?
Time to go for an additional sunset summit.
With bad weather quickly moving in, we decided to go for it in case the opportunity to summit wasn’t there in the morning. Our campsite was enshrouded in thick mist and we could hear a light rain beginning to fall on the trees. Off we went with the hope that the weather wouldn’t develop any further for the next 40 minutes it would take us to summit.
Our wishful thinking quickly came undone, as we were caught out in a deluge, getting battered by wind. We made it around 1/3 of the way to the summit before turning back, having realised the weather was only going to deteriorate further and the chance of seeing anything up there was essentially zero.


We were only away from camp about 35 minutes but we were all soaked through to the bone, despite our best waterproof gear.
Arriving back at camp, we huddled around the campfire our guides had built (more of a bonfire to be honest) to warm up and dry our gear. And, of course, have one, or ten, s’mores to ease the dissapointment of a failed summit.
Summit Attempt Number 2
Like a turtle emerging from it’s shell, I poked my head out of my tent at 4am the next morning to see a sky full of stars. Result. The weather had passed and this time we were definitely summitng!
Off we set, head torches on and treading the same path we had done the day before, this time though with no river forming at our feet, and the cold night air remaining still and calm.
Whilst the thin air provides some challenge, the reality is the climb from camp to summit is a short one that is fairly comfortable, taking around 40 minutes to climb 200m or so.

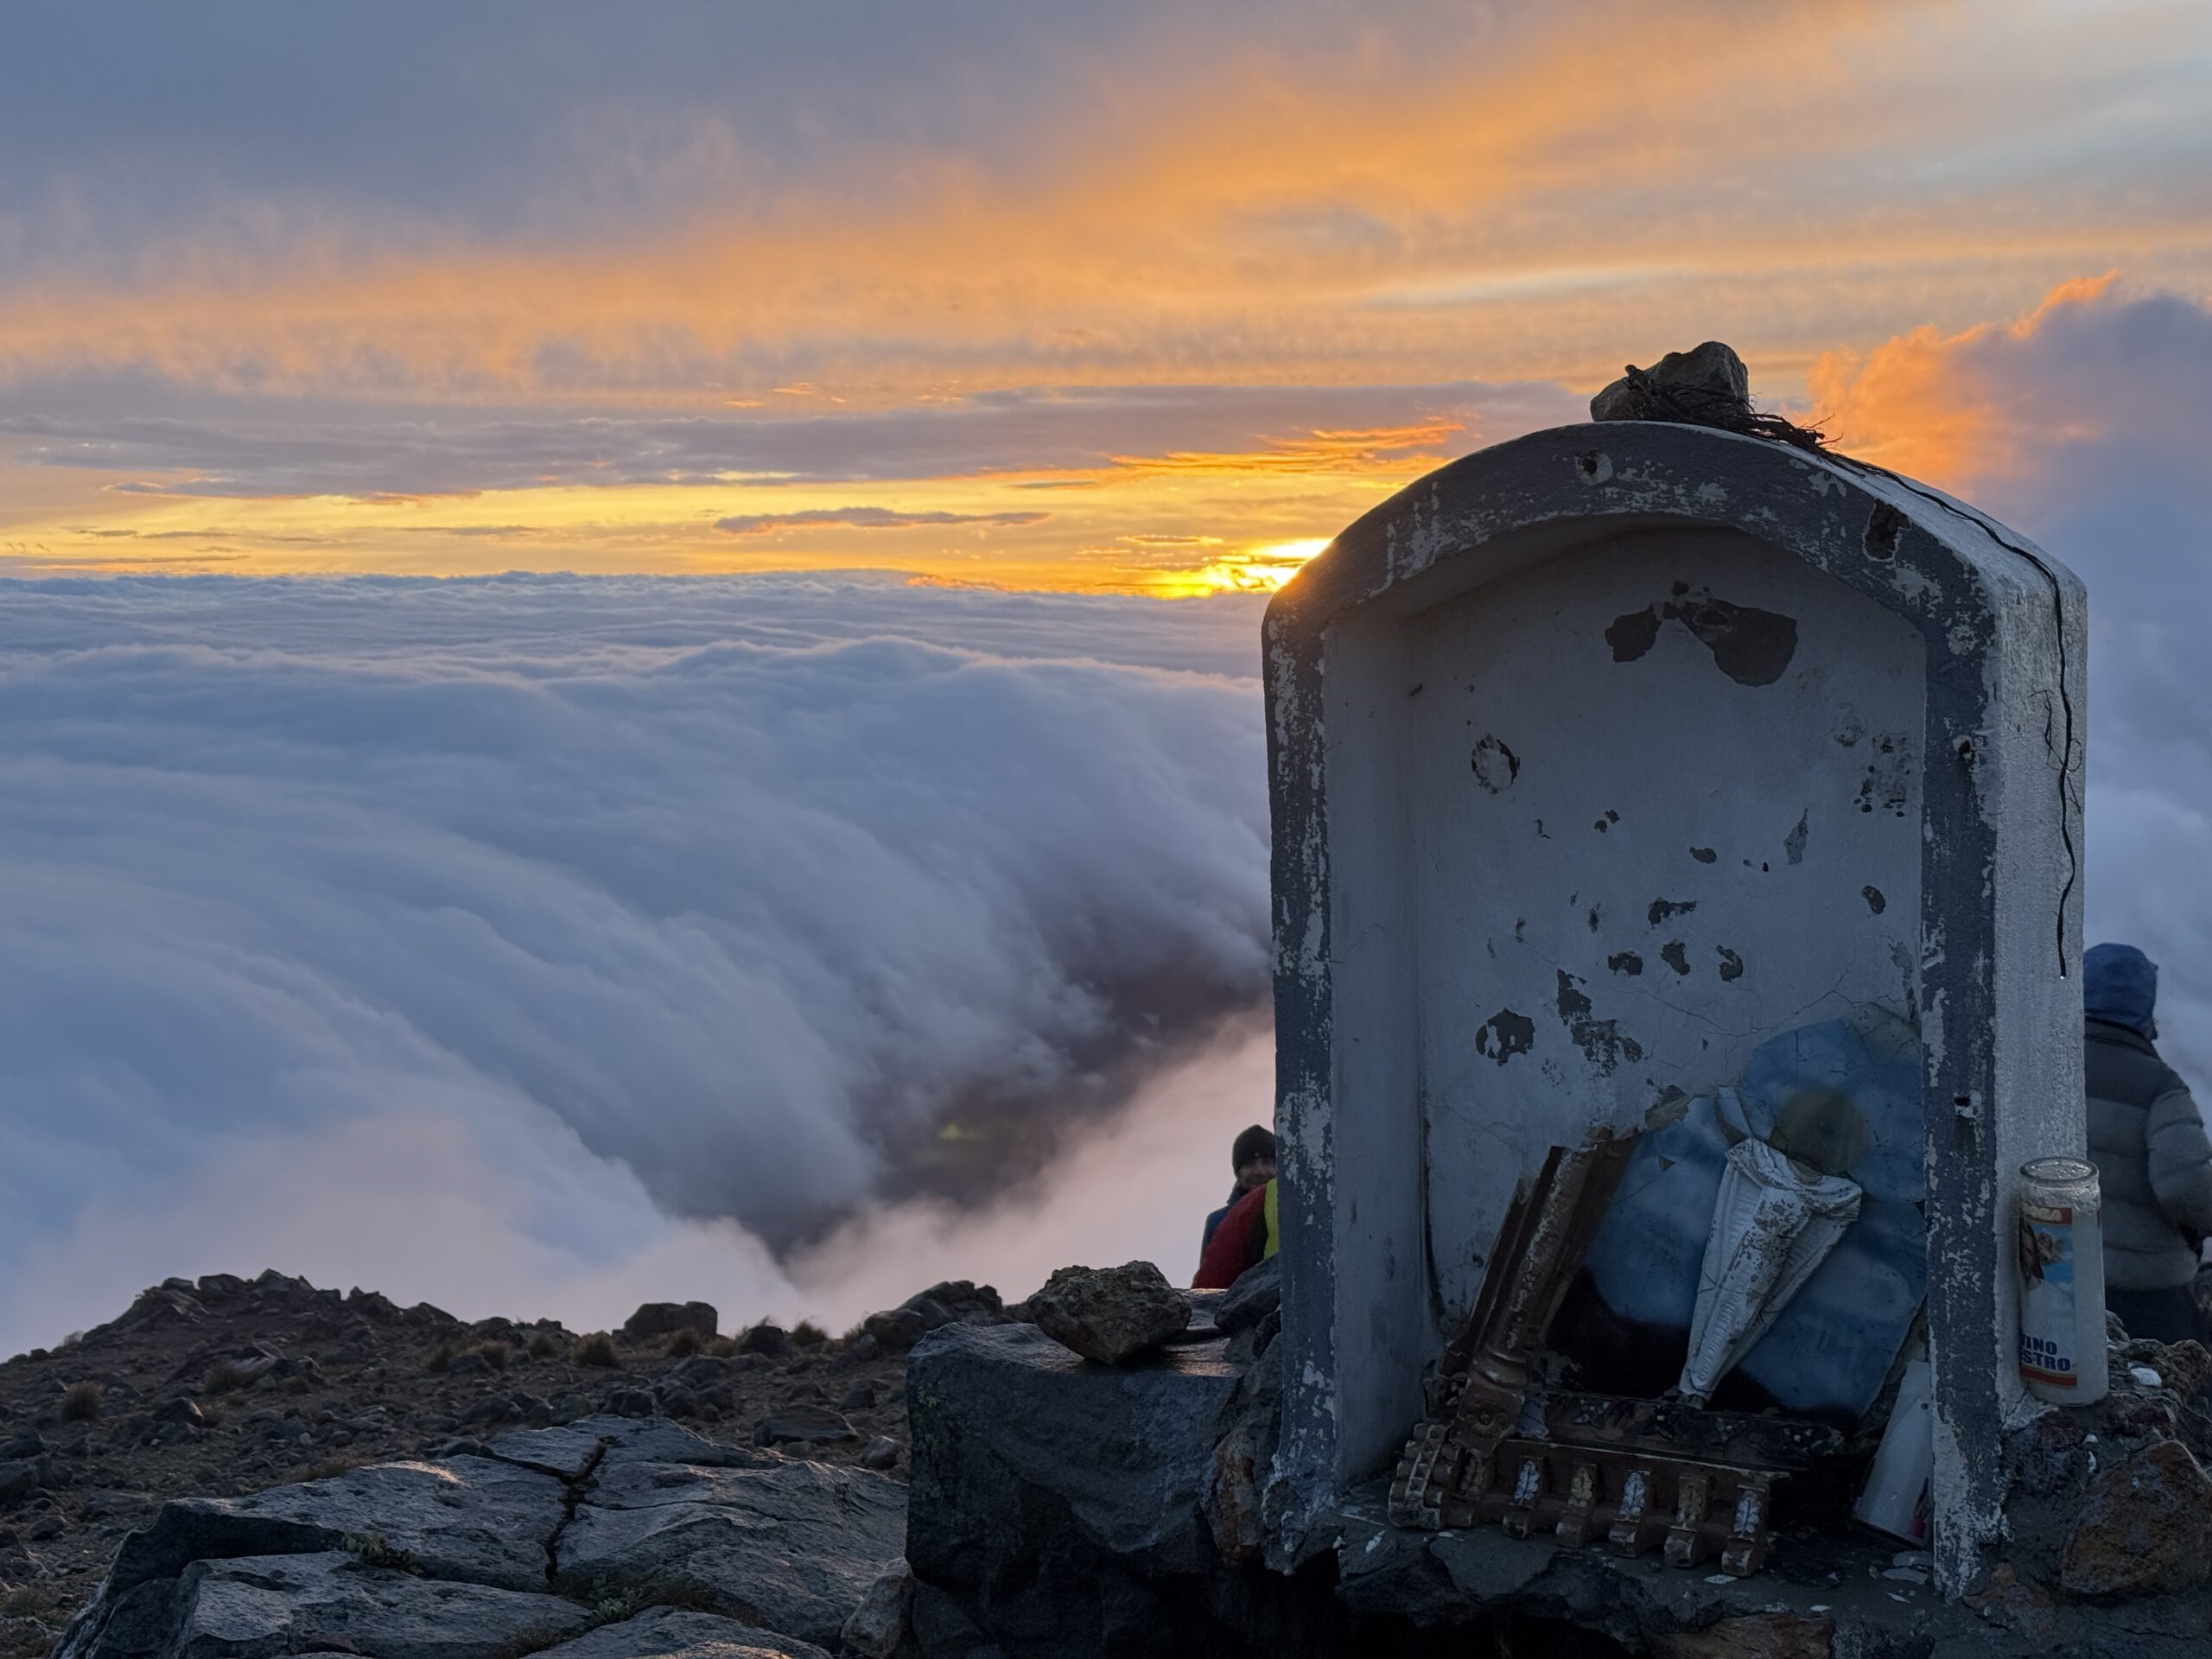
And once we hit the summit the views were simply incredible.


After taking in sunrise on the summit, it was time to head back down.
It was a short walk back to camp, before having breakfast, packing up and heading back down to the road, where we were greeted by the pick up trucks again for another knee crushing ride back to civilisation. Lovely.

Top Tips for Climbing Tajumulco
Here are my tops tips for climbing and successfully summiting Tajumulco;
- Acclimatise. With Tajumulco standing at 4,203m, altitude sickness can occur. Spending a day or two in Xela (2,333m) or other high-altitude areas, before attempting the climb will help your body adjust.
- Go for a 2-day climb. This gives you a chance to catch sunrise on the summit.
- Hire a guide. Although the trail is relatively straightforward, hiring a local guide, or joining a group tour, can help make life much easier as they’ll handle logistics like transportation, meals, and camping equipment.
- Pace yourself. The climb from camp to summit is a short one and there’s no need to race up it. Take your time, going too fast will leave you sweaty and with more time on the exposed summit. Meaning you’re going to get cold. Going slower means you stay warm and dry whilst also reducing your chances of developing altitude sickness from over-exertion in the thin air.
- One of the quickest routes to altitude sickness is through dehydration, so stay well hydrated! I would recommend drinking at least 3 litres each day.
- Prepare for Unpredictable Weather. Weather on Tajumulco can change rapidly. Rain, wind, and sudden cold snaps are common, even in the dry season. Temperatures can get well below 0C on the summit. Dress in layers to stay warm and make sure to pack your waterproofs.
- Don’t forget the headtorch. You don’t want to be using the light on your phone whilst walking up on potentially loose and slippery rocks, you need your hands to be free.